
“Preparation email told us exactly what to clear and it made the whole appointment quick and easy. Technician was in and out within the hour and explained the drying time clearly.”
AEPMA-certified technicians • Clyde North to greater Melbourne
Pest Control Pre-Treatment Guide Melbourne | How to Prepare
Proper pre-treatment preparation genuinely matters — it guarantees maximum chemical efficacy, safeguards family members and pets, and ensures compliance with Victorian building and health regulations. This guide walks through exactly how to prepare a Melbourne home, termite barrier site or commercial kitchen for treatment, module by module, so nothing is left to guesswork on the day, whatever type of pest treatment you've got coming up.
- ✓ 7 complete preparation modules
- ✓ Family & pet safety protocols
- ✓ HACCP-ready commercial prep
- ✓ AEPMA-certified technicians
Start here
Book Your Treatment & Get Preparation Guidance
No obligation, expert guidance, exact fixed pricing. Book online this Sunday & save with our VIP Members offer, and receive tailored preparation guidance for your specific treatment type before your appointment.
📋
7 Prep Modules
Complete preparation guide
🐾
Family & Pet Safe
Clear re-entry guidance
🍽️
HACCP-Ready Prep
Commercial kitchens
$
Zero Hidden Fees
Price before booking
📍
199+ Suburbs
Clyde North to CBD
⭐
4.9 Rating
2,000+ reviews
Seven modules, everything you need to prepare
How to Prepare for Pest Control in Melbourne
Pest control pre treatment instructions Melbourne clients actually need go well beyond "clear the kitchen bench" — how to prepare house for pest spray, a termite barrier installation, or a commercial kitchen treatment each involve genuinely different steps, safety considerations and timing. This guide breaks preparation into seven modules covering every treatment type we deliver, so you can jump straight to what's relevant or read the full sequence before your appointment. Whether you're a homeowner booking your first pest treatment or a commercial operator managing recurring compliance requirements, the module structure below is designed to answer your specific question quickly.
🏠
Module 1
General Household Prep
🏚️
Module 2
Termite Barrier Prep
🍽️
Module 3
Commercial Kitchen Prep
🐾
Module 4
Family & Pet Safety
🌿
Module 5
Outdoor & Garden Prep
⏱️
Module 6
During vs After
⚠️
Module 7
Why DIY Prep Fails
❓
Full FAQ
Common Questions
A written pre-treatment checklist tailored to your specific booking is also provided when you confirm an appointment, so nothing in this general guide needs to be memorised — think of this as the reference, not a substitute for the confirmation email you'll receive, which will always reflect the exact requirements for your property and treatment type.
Everything below, in one scannable list
Complete Pre-Treatment Checklist at a Glance
If you only have five minutes before your appointment, this is the condensed version of every module below — pin it, screenshot it, or come back to the full module for the reasoning behind each step. The full detail for each row lives in the matching module further down this page.
| Treatment Type | Top Priority Prep | Typical Re-Entry / Drying |
|---|---|---|
| General household spray | Clear cupboards, cover fish tanks, remove floor items | 1-2 hours to dry; avoid washing surfaces for 7-14 days |
| Termite barrier / subfloor | Clear perimeter, unblock subfloor hatches, turn off reticulation | Several days for full bonding depending on product and weather |
| Commercial kitchen | Cover food surfaces, seal utensils, coordinate a shutdown window | Confirmed on-site by technician against HACCP requirements |
| Outdoor / garden perimeter | Mow lawns, clear pet waste, cover garden ponds | Keep pets off treated areas until fully dry, usually 1-2 hours |
Module 1
General Household Pest Treatment Preparation
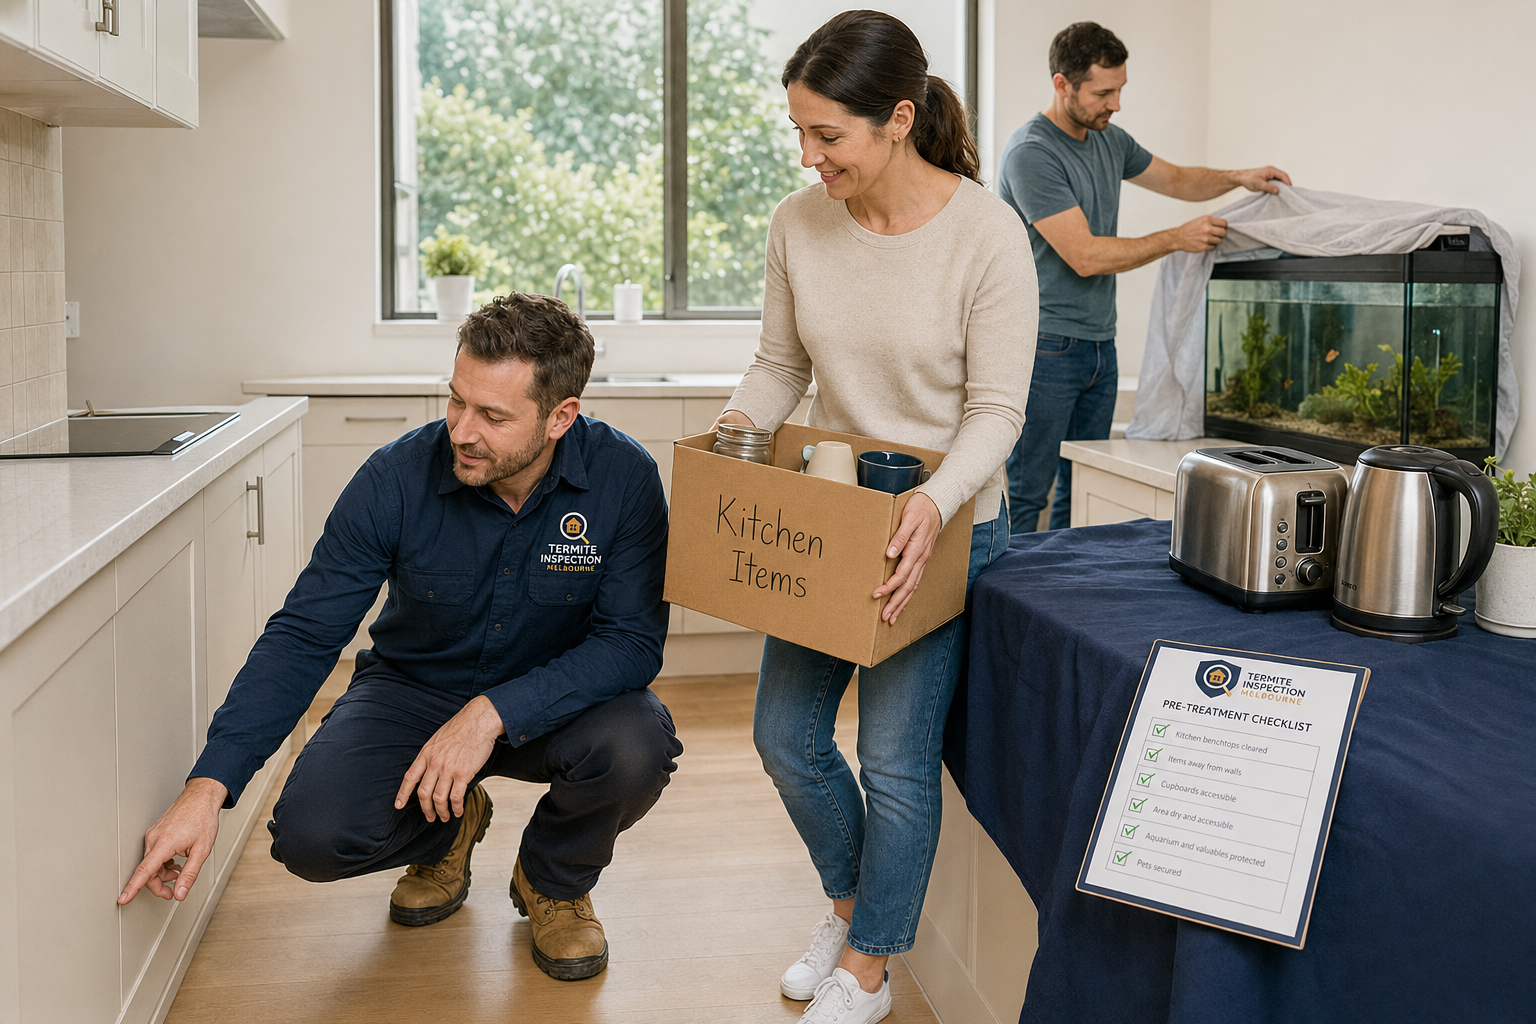
The standard preparation for a general pest spray — ants, spiders, cockroaches and similar household pests — comes down to giving our technician clear, unobstructed access to skirting boards, corners, cupboard interiors and entry points. None of the six steps below take more than a few minutes each, but skipping them is the single biggest reason a general treatment underperforms.
Clear Kitchen Cupboards
Remove crockery, food items and loose contents from cupboards along external walls and near skirting boards, particularly base-level cupboards where treatment is most commonly applied. You don't need to empty every cupboard in the kitchen — just those our technician flags as treatment points, usually communicated in your confirmation details ahead of the visit.
Box or Bag Pantry Items
Open food packaging, loose pantry staples and anything not in a sealed container should be boxed, bagged or temporarily relocated away from the treatment area. This isn't about deep-cleaning the pantry — it's about making sure nothing edible is left exposed to overspray during application, particularly on lower shelves nearest the floor.
Cover Fish Tanks
Fish are highly sensitive to many pest control chemicals even in trace airborne amounts. Cover the tank completely and switch off any air pump or filtration system that draws in room air during treatment and for the drying period afterwards, then run it as normal once the area has fully aired out and the technician confirms it's safe.
Wash Pet Bedding
Wash and, where possible, temporarily relocate pet bedding away from treatment zones, particularly for flea or general pest treatments targeting carpeted areas. Freshly washed bedding also means pets aren't reintroducing residue from an untreated area back onto a treated surface once they're allowed back into the room.
Remove Toys From Floors
Clear children's toys, pet toys and any items regularly handled or mouthed from floors and low surfaces before the appointment, and keep them off treated floor areas until the surface has fully dried and any specified re-entry period has passed completely.
Access Points to Leave Clear
Skirting boards, external wall lines, window sills and any known ant trail or spider web site should be left fully accessible — move furniture away from walls where practical so our technician can treat the full perimeter rather than working around obstructions, since gaps left untreated are exactly where pests tend to re-establish first.
Module 2
Termite Barrier & Subfloor Liquid Treatment Prep
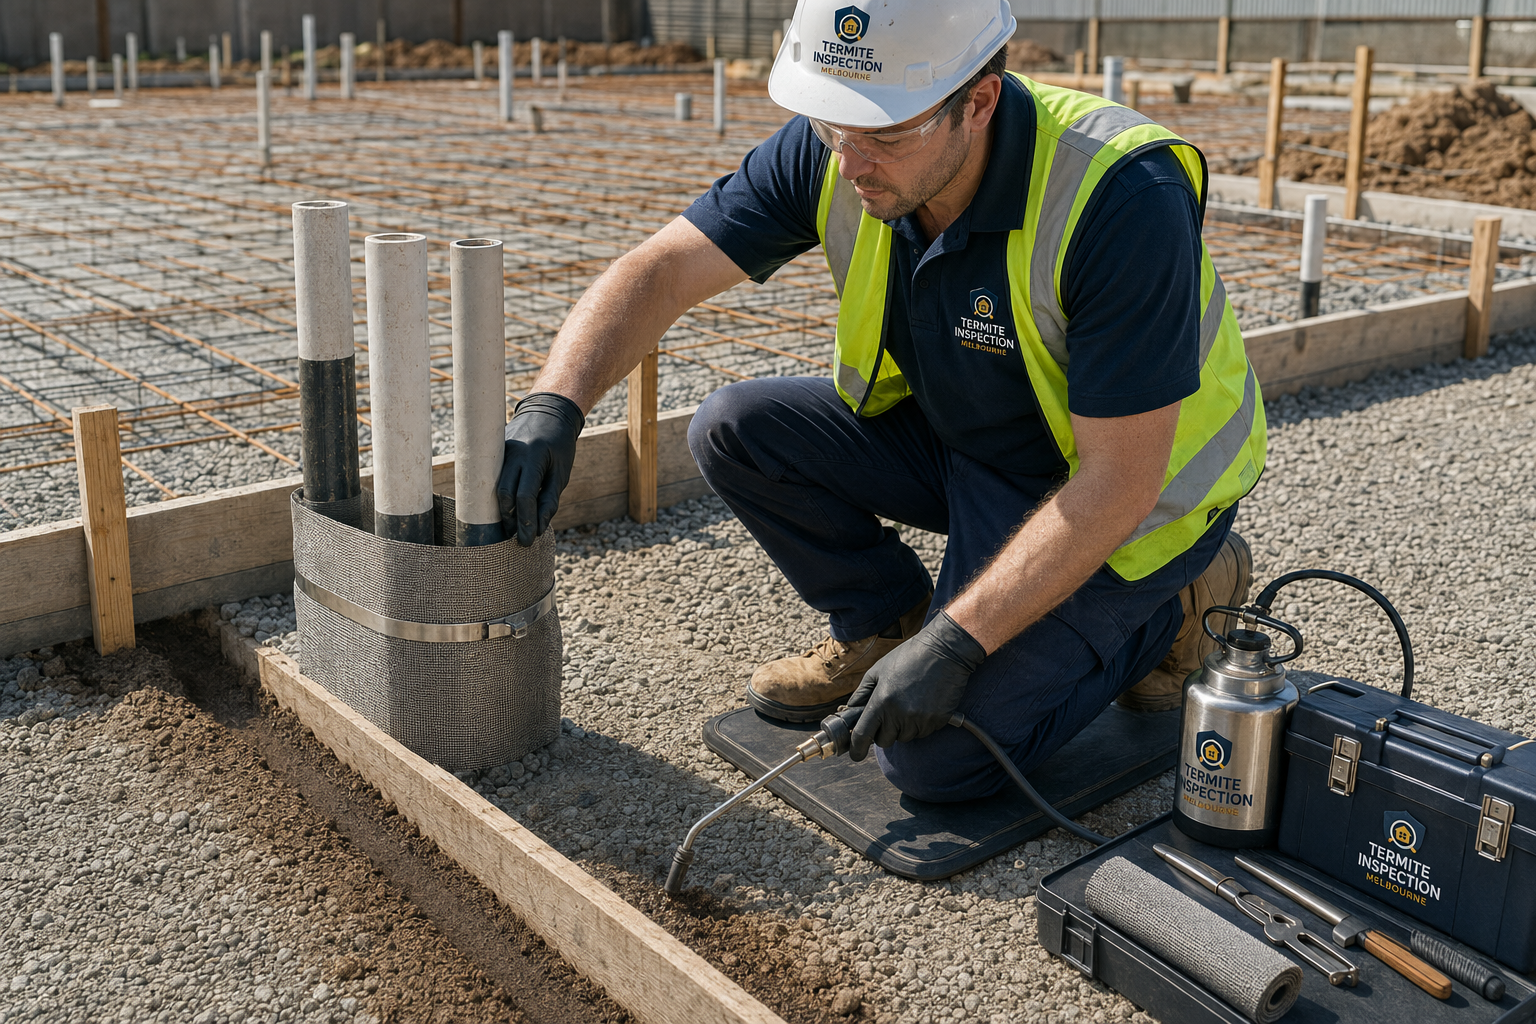
Termite barrier preparation Victoria properties need is more involved than a general spray, since trenching, drilling and subfloor access equipment require genuine physical clearance around the entire perimeter and any subfloor access point. Skipping preparation here doesn't just slow the job down — it can leave gaps in the finished barrier that a colony can exploit.
Clear Perimeter Garden Beds
Trenching equipment needs a clear run along the external wall line, so garden beds, potted plants, decorative edging and mulch built up hard against the foundation should be pulled back at least 300-400mm from the wall ahead of the appointment. This also happens to be good ongoing termite-prevention practice regardless of the treatment being carried out.
Store Timber Away From Foundation Walls
Firewood stacks, garden edging timber, stored building materials and similar timber items should be relocated well clear of external walls before the appointment — beyond simply being in the way, timber-to-ground contact against a foundation is exactly the kind of bridge a termite barrier is specifically designed to prevent from forming.
Unblock Subfloor Access Hatches
Ensure subfloor manholes and access hatches are free of stored items, overgrown vegetation or accumulated debris. Our technicians need genuine physical access to inspect and treat the subfloor space, and a blocked hatch is one of the most common reasons a subfloor treatment takes longer than scheduled or requires a return visit entirely.
Turn Off Reticulation Systems
Switch off any sprinkler or drip irrigation system covering the treatment zone at least 24 hours beforehand, and keep it off for the period specified afterwards. Water running through a freshly applied chemical soil treatment can dilute or wash it away before it bonds properly with the soil, undermining the barrier's overall long-term effectiveness.
Access note: if a section of perimeter or subfloor genuinely can't be cleared before the appointment — a fixed structure, a locked gate, a heavy stored item — call ahead so we can plan around it, rather than discovering the obstruction on the day, which can mean an incomplete barrier or a rescheduled visit for that section. A five-minute phone call ahead of time almost always saves a much longer conversation on the day itself.
Module 3
Commercial Kitchen & Hospitality HACCP Prep
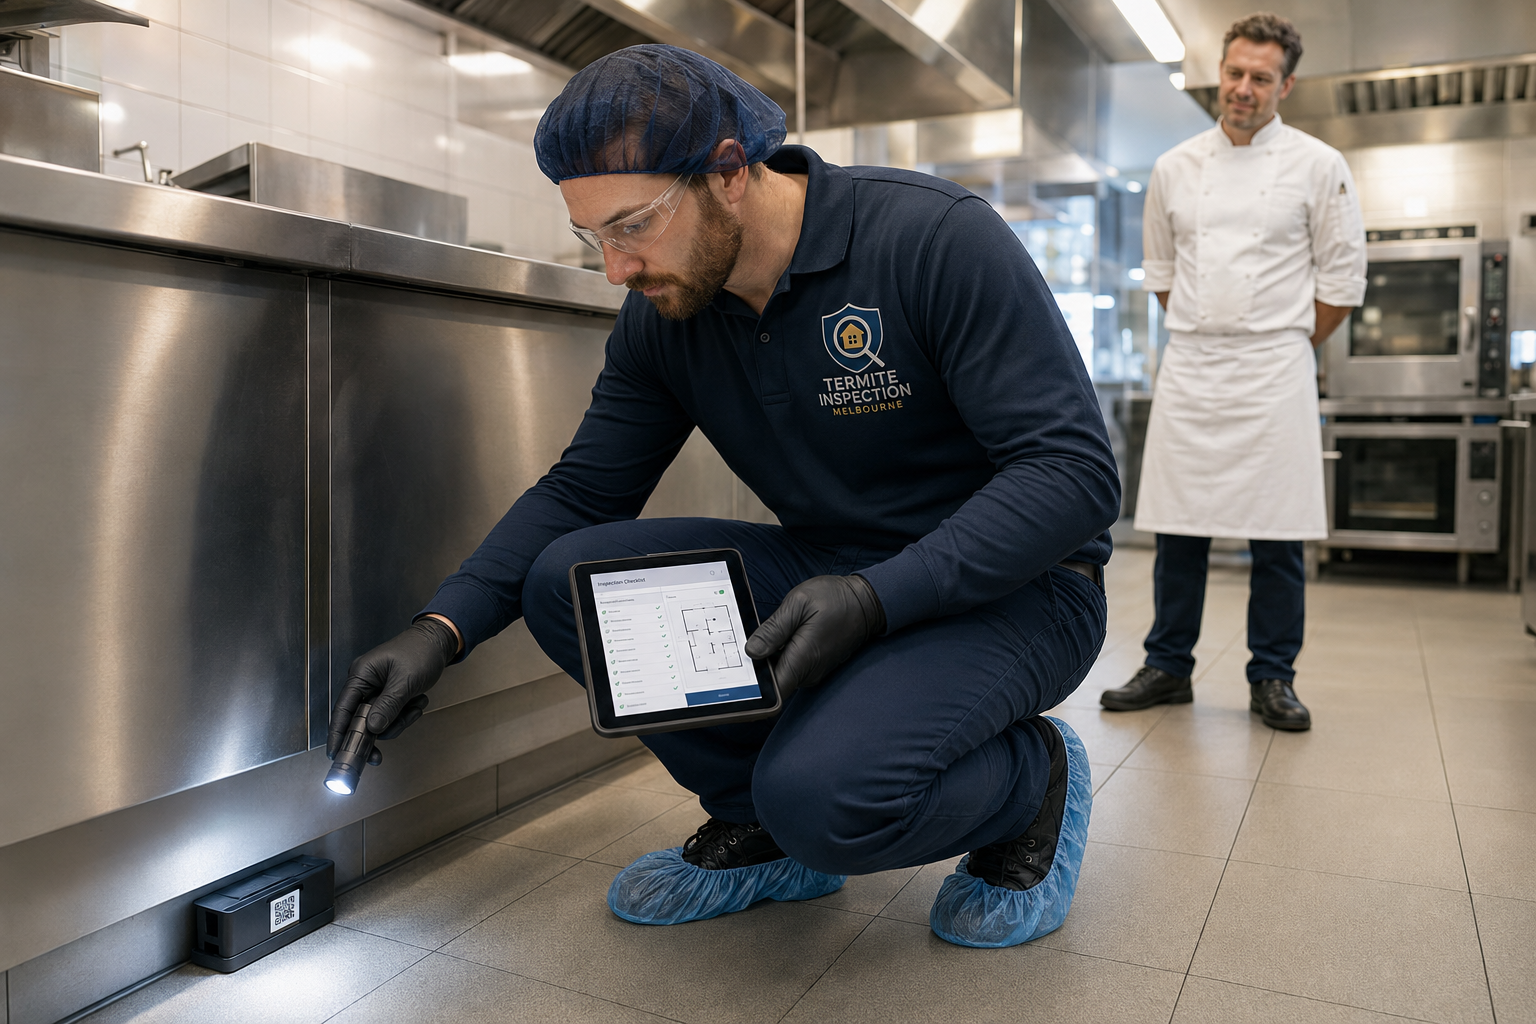
Commercial kitchen pest control prep carries food-safety stakes a residential job doesn't — every step below exists to keep treatment HACCP-compliant and service disruption to a minimum. We work these steps into a written checklist specific to your kitchen layout and trading hours ahead of every commercial appointment.
Cover Food Prep Surfaces
All food-contact surfaces, prep benches and open ingredient storage should be covered or cleared before treatment begins, and left covered until the technician confirms it's safe to resume food handling on that surface — a step every HACCP auditor expects to see clearly documented in your pest management file.
Safely Seal Utensils
Loose utensils, crockery and cookware in or near the treatment zone should be sealed in cupboards or drawers, or relocated to an unaffected area of the kitchen, so nothing that will contact food is exposed to overspray or dust treatment during the application process.
Wash Down Grease Traps
Where the treatment targets drain flies, cockroaches or a drainage-linked pest issue, a pre-treatment wash-down of grease traps and floor drains significantly improves the effectiveness of any enzymatic or residual product applied afterwards, since built-up grease can otherwise block the product from properly reaching the breeding site.
Coordinate Shutdown Windows
We work with your team to schedule treatment around closing time, a quiet trading period, or a planned shutdown window wherever the treatment type allows, so service disruption is minimised. A written pre-treatment checklist specific to your booking is provided ahead of time so your staff know exactly what to prepare and when, right down to which prep areas apply to your specific kitchen layout.
HACCP note: every commercial treatment includes a dated, itemised service report suitable for your pest management compliance file — ask our technician for a copy on the day if you need it for an upcoming health inspection.
Preparation doesn't end when the technician leaves
Post-Treatment Follow-Up & Monitoring
What you do in the days and weeks after treatment plays as much a role in the outcome as the preparation beforehand — the four points below are what we ask every client to keep an eye on after we leave.
Watch for Continued Activity
A small amount of pest activity in the first few days after treatment is normal, as pests already inside make their way out and cross the treated surface. Genuine concern is activity that hasn't reduced noticeably after the specified waiting period — that's the point to call rather than continuing to wait.
Keep Your Service Report
Store your written service report or termite barrier certificate somewhere accessible — it's often required for warranty claims, insurance purposes, or a future property sale, and having it on hand saves time if you ever need to reference exactly what was treated and when.
Schedule the Next Inspection
For termite barriers and ongoing commercial programs, mark the next recommended inspection date in your calendar as soon as your report arrives — annual termite inspections in particular are easy to let slip once the immediate treatment is done and out of mind.
Call If Anything Feels Off
If a pet or family member has an unexpected reaction, or you're simply unsure whether something you're seeing is normal post-treatment activity or a sign the job needs revisiting, call rather than wait — a quick phone conversation is far easier to resolve than a problem left to develop.
Module 4
Pet, Wildlife & Family Safety Protocols
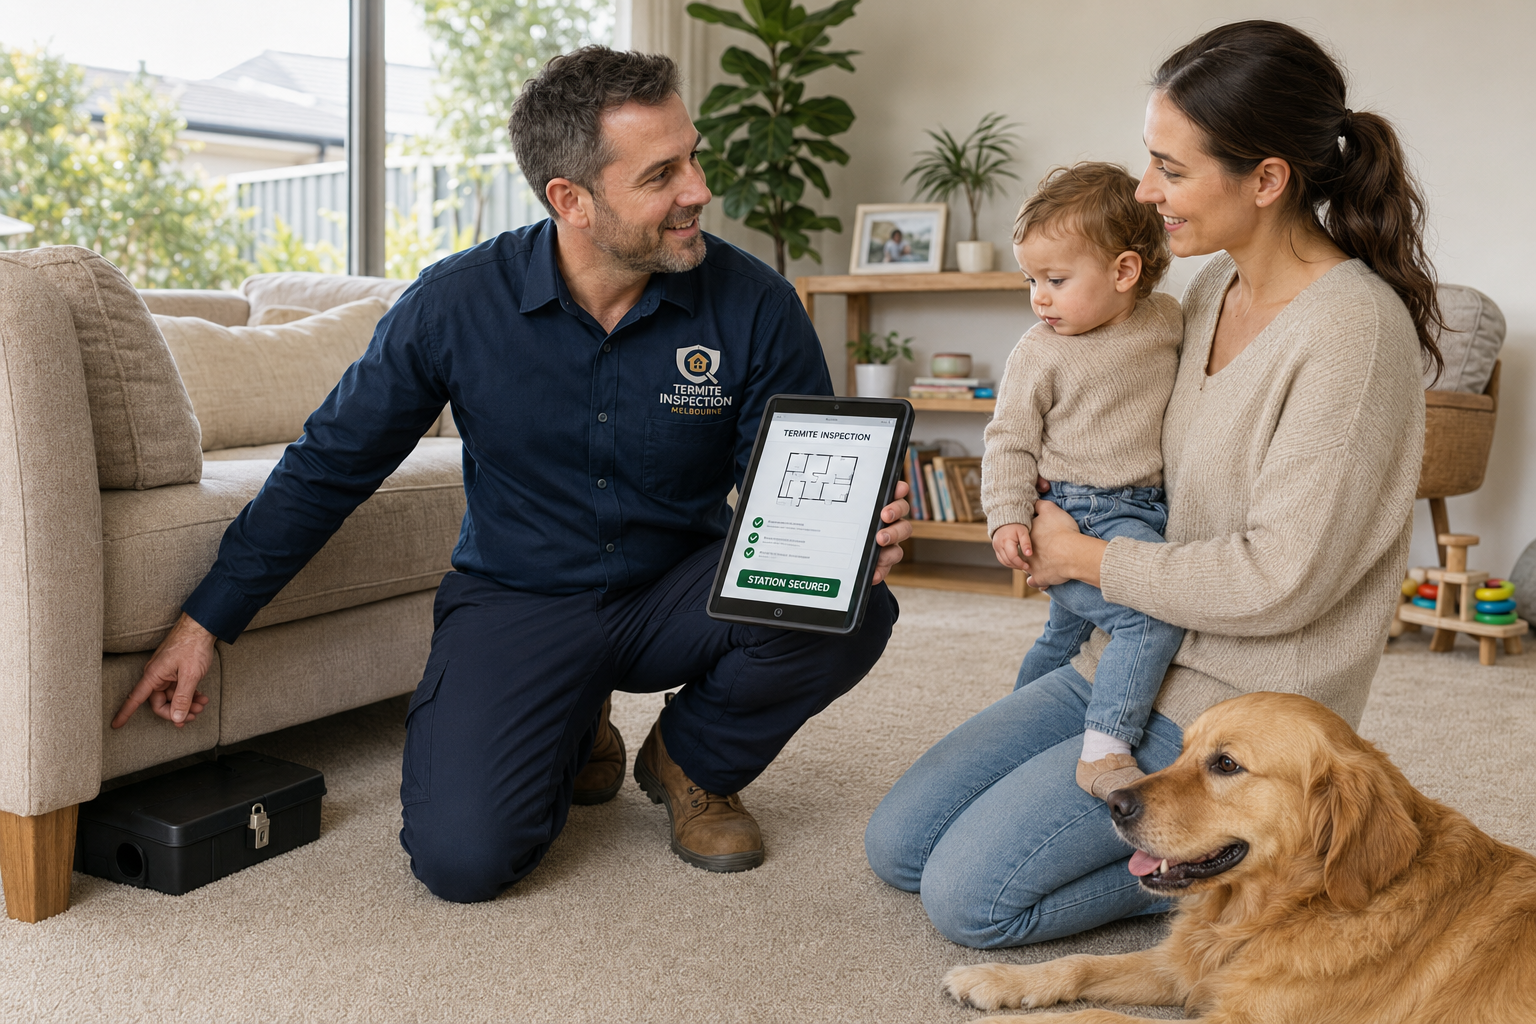
Family safe pest treatment Melbourne households expect is the standard we work to on every job — these are the protocols that keep it that way, covering everything from re-entry timing to the specific needs of birds, reptiles and other sensitive pets that a general "keep pets away" instruction doesn't fully address.
⏱️ Safe Re-Entry Timeframes
Most treated indoor surfaces are safe for normal contact once fully dry, typically 1-2 hours depending on ventilation and weather, while outdoor perimeter and barrier treatments may need a longer clearance period — our technician confirms the exact timeframe for your specific treatment on the day, in writing if requested.
🌬️ Ventilation Guidelines
Open windows and doors to ventilate treated indoor areas once application is complete, and keep the space well-aired for the drying period. Good airflow speeds up drying time and reduces any lingering odour faster than a closed-up, stuffy room would.
🐦 Sensitive Birds & Reptiles
Birds have an especially sensitive respiratory system and should be relocated to a different part of the property, or off-site if practical, during and for several hours after treatment. Reptile tanks and enclosures should be covered and any ventilation drawing in room air switched off during the same window, similar to standard fish tank protocols.
🌱 Eco-Friendly & Low-Toxicity Options
Lower-toxicity and family-friendly formulations are available for most standard treatments — ask when booking if you have young children, pregnant household members, sensitive pets, or simply prefer this approach, and we'll confirm which product options suit your specific situation.
Module 5
Outdoor, Yard & Garden Preparation
Outdoor treatments — flea, spider and general perimeter pest control especially — depend on decent yard access and a few simple preparation steps to get full coverage. A little yard tidying beforehand routinely makes the difference between an even, effective perimeter treatment and one with gaps a technician had to work around.
Mow Lawns Beforehand
Mow lawns a day or two before a flea or spider treatment — shorter grass allows the product to reach soil level and ground-dwelling pests directly, rather than being caught up in overgrown blades where it won't do its job effectively across the whole yard.
Clear Pet Waste
Remove pet waste from the yard before the appointment, both for hygiene during application and because organic matter on the ground can affect how evenly a perimeter treatment settles onto the soil and grass surface across the yard.
Secure Outdoor Furniture
Move outdoor furniture, toys and equipment away from treatment zones where practical, or be prepared for it to be lightly repositioned by our technician to access the full perimeter — items left in place simply reduce the coverage achievable in that spot, particularly along fence lines and garden edges.
Protect Garden Ponds
Fish and aquatic life in garden ponds are highly sensitive to many pest treatments. Cover or net ponds during application, and let our technician know about any water feature on the property before the appointment so the treatment plan can account for it in advance.
Module 6
What Happens During vs. After Treatment
Knowing what to expect on the day — and, just as importantly, what not to do afterwards — is what actually protects the effectiveness of a treatment you've already paid for. Most "the treatment didn't work" callbacks we investigate trace back to one of the four points below being missed, not a genuine product failure.
Application Methodology
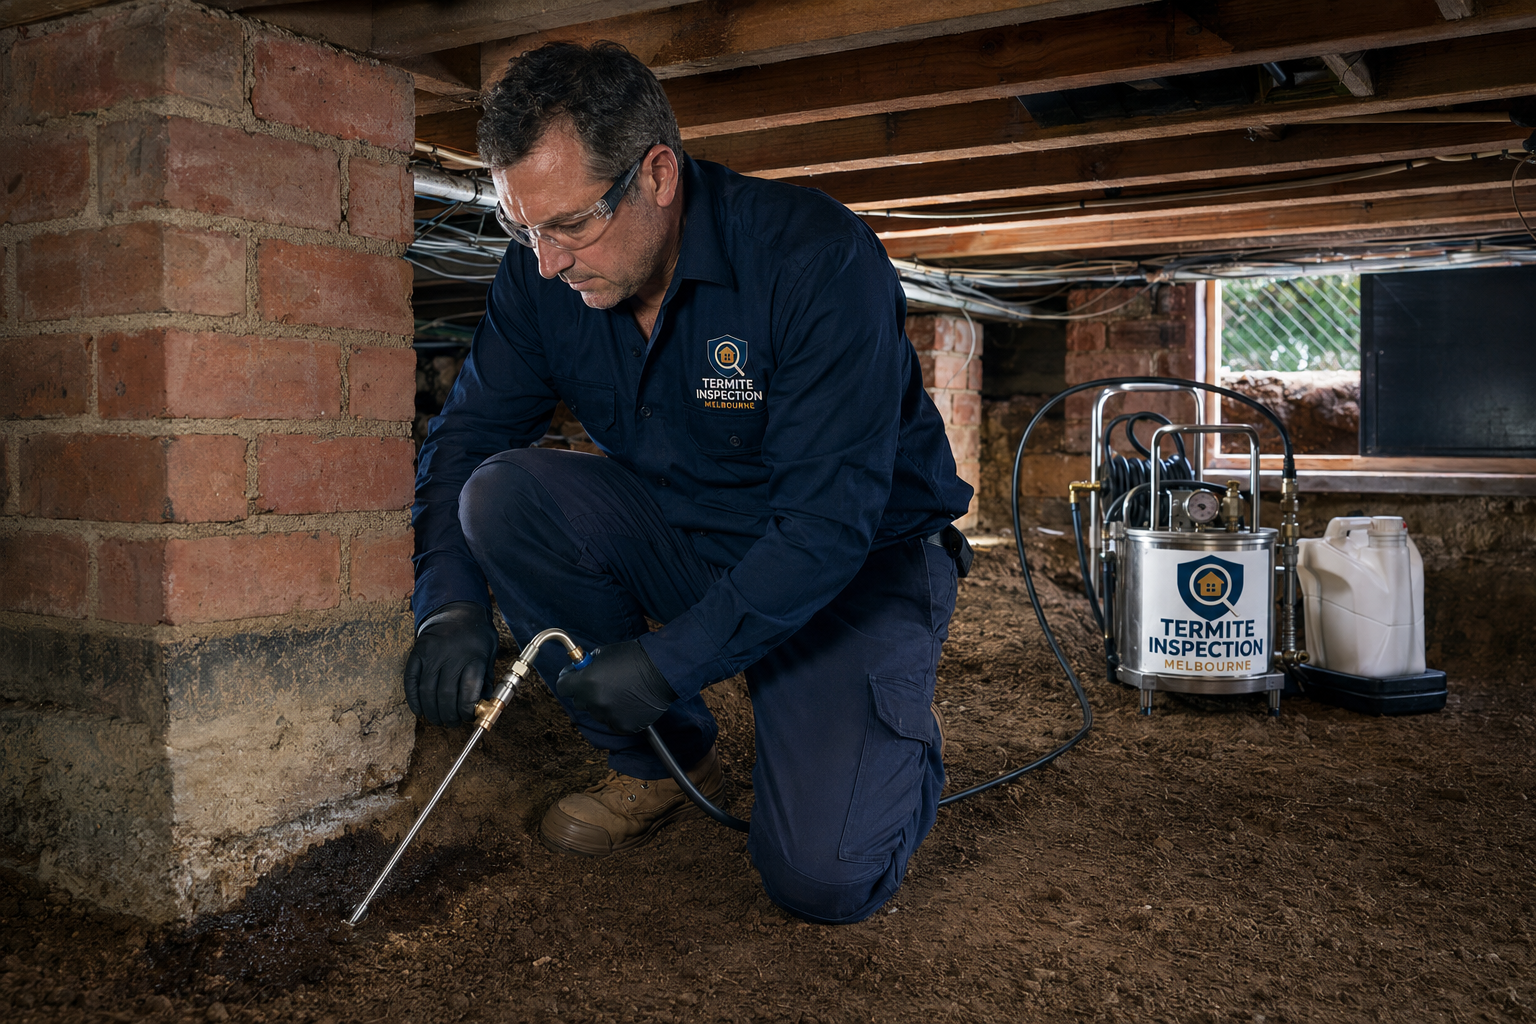
Depending on the pest and treatment type, application may involve targeted spraying along skirting boards and entry points, gel or granular baiting placed in cracks and voids, dust treatment in wall cavities, or liquid soil treatment around a perimeter. Your technician explains what's being used and why before starting.
Drying Times
Most surface treatments dry within 1-2 hours under normal ventilation, though this extends in cold, humid or poorly ventilated conditions. Outdoor perimeter and soil treatments can take longer to fully settle — your technician will confirm the specific window for the product used on your property.
Vacuuming Restrictions
Avoid vacuuming treated carpets and floors for at least 7-14 days after a residual treatment — vacuuming removes the active product from the surface before it's had time to work against pests crossing it, undoing much of the treatment's intended effect.
Why Not to Wash Treated Skirting Boards
Skirting boards and treated surfaces are deliberately left with a light, lasting residue that pests pick up as they cross it over following days and weeks — washing it down immediately after treatment, even with plain water, strips that residue away and is one of the most common reasons a treatment appears not to have worked.
Module 7
Why DIY Preparations Fail Without Professional Backup
Even excellent preparation can't compensate for the limitations built into over-the-counter products, which is worth understanding before deciding between a DIY approach and a professional treatment. The two points below explain exactly why.
The Limits of Supermarket Bombs
Foggers and bug bombs disperse product into open air, which only affects pests caught out in the open at that exact moment. Colonies sheltering in wall cavities, subfloors, roof voids or deep cracks are largely untouched, and the sudden exposure can actually scatter a population deeper into inaccessible areas rather than eliminating the source — the opposite of what proper preparation and professional-grade product placement achieves.
Professional Equipment Needs Genuine Site Clearing
Power sprayers, trenching units and subfloor access equipment require the kind of clearance detailed in Modules 1-5 above — not because it's a formality, but because the equipment physically can't do its job around obstructions. A supermarket spray bottle doesn't have this constraint because it also doesn't have the reach, pressure or targeted application capability a professional treatment relies on.
Proper preparation is what lets professional-grade equipment and products actually perform to their full capability — a trenching unit run along a cleared perimeter delivers a consistent, unbroken termite barrier, while the same equipment working around garden beds and stored timber leaves gaps a colony can exploit. The preparation steps in this guide aren't administrative box-ticking; they're the difference between a treatment that works as designed and one that only partially does.
Preparing for an Urgent or Same-Day Appointment
If you've booked an urgent same-day treatment — a live termite sighting, a wasp nest, or a sudden infestation — you won't always have time to work through every module above in full. In that situation, prioritise the highest-impact steps: clear the immediate treatment area, secure pets away from the zone, and flag any fish tanks, birds or sensitive household members when you call. Our technician will work efficiently around whatever hasn't been prepared and can advise on the spot what matters most for your specific situation, so a rushed booking is never a reason to skip calling for help.
Ask any pest control pre treatment instructions Melbourne provider and they'll tell you the same thing: preparation and treatment are two halves of one job, and skipping either half is why a perfectly good product sometimes gets blamed for a result it was never given a fair chance to achieve.
Small steps, big impact on treatment day
Frequently Missed Preparation Steps
These are the steps our technicians most often find still outstanding on arrival — none of them are complicated, but each one genuinely affects how thoroughly a treatment can be carried out. Being aware of these four before your appointment takes just a couple of extra minutes and noticeably improves the result.
Forgetting the Subfloor Hatch
Even property owners who prepare the rest of the house thoroughly often overlook the subfloor access hatch, which is frequently hidden behind stored items, overgrown vegetation, or simply forgotten because it's rarely used day to day. For any termite-related treatment, this is genuinely one of the most important access points on the entire property, and a locked or blocked hatch is the single most common cause of a rescheduled subfloor appointment.
Leaving Pets Home Without a Plan
Pets left roaming freely during a treatment, rather than confined to an untreated area or briefly relocated, are the most common reason a technician has to pause or work around an area more carefully than planned — slowing the appointment down for everyone.
Not Mentioning Aquariums or Reptile Tanks
Fish tanks and reptile enclosures are easy to forget mentioning when booking, especially if they're in a room not obviously connected to the treatment area, but airborne product can still reach them through open doorways or shared ventilation. Always flag these when you book, not just on the day, so the technician can plan the application to account for them from the start rather than adjusting on arrival.
Watering the Garden Right Before a Barrier Treatment
A well-meaning attempt to help by watering the garden bed immediately before a termite barrier appointment can actually oversaturate the soil and interfere with proper chemical bonding — the timing detailed in Module 2 and the seasonal notes below matters more than simply "more water is better." When unsure, ask your technician for the specific watering timing that suits your appointment rather than guessing.
A confident booking starts with the right questions
Questions to Ask Before You Book
Whether you're booking with us or comparing providers, these are the questions worth asking upfront so there are no surprises on treatment day. A provider confident in their process will answer every one of these without hesitation.
🧴
What product will be used?
Ask whether it's a standard or low-toxicity option, and whether it's suitable given any pets, children, or sensitivities in the household.
⏱️
What's the exact re-entry time?
Get a specific timeframe for your treatment and property, not a generic rule of thumb — drying time varies by product, weather and ventilation.
📋
Is a written report included?
Particularly important for termite work and commercial kitchens, where documentation matters for compliance, insurance, or a future property sale.
🔁
What happens if it doesn't work?
Ask about the warranty terms and what a follow-up visit involves if pest activity continues after the specified waiting period.
🐾
How does this affect my specific pets?
Generic pet advice doesn't always cover birds, reptiles, or exotic pets — ask specifically if your household includes anything beyond a cat or dog.
📞
Who do I call if I have concerns after?
Confirm there's a direct line back to the technician or company if something feels off after treatment, rather than a generic call-centre queue.
Why the guidance source matters
Pre-Treatment Guidance Providers Compared
Preparation advice is only as good as the safety knowledge and compliance experience behind it — the same generic instruction sheet doesn't hold up across a family home, a rental property and a commercial kitchen with different stakeholders and different risks involved.
| Provider | Safety Compliance | Family / Pet Protection | Structural Termite Clearance | Post-Treatment Warranty |
|---|---|---|---|---|
| TIM's Professional Pre-Treatment Guidance | ✓ APVMA-approved products, label-directed | ✓ Written re-entry & ventilation guidance | ✓ AS 4349.3-aligned barrier prep | ✓ Written guarantee on qualifying treatments |
| DIY Supermarket Prep Guesswork | ⚠️ Generic label instructions only | ⚠️ No professional oversight | ✗ No structural clearance capability | ✗ None |
| Unqualified Handymen | ✗ Not licensed for pest treatment | ⚠️ Variable, unregulated advice | ✗ Not species or barrier-trained | ✗ Informal, rarely in writing |
| National Call Centres | ⚠️ Generic scripted guidance | ⚠️ Standard advice, not site-specific | ⚠️ Available, less local site knowledge | ⚠️ Standard corporate terms, less flexible |
Our recommendation: preparation guidance that's specific to your property, your treatment type and the current season is what actually protects both the treatment's effectiveness and your family's safety — a generic label instruction or a scripted call-centre answer can't account for your subfloor access point, your pet's specific needs, or Melbourne's current weather pattern the way a technician who's about to walk your property can. The gap between providers rarely shows up in the price quoted; it shows up in whether the guidance you're given actually matches your property.
Preparation changes with the season
Melbourne Climate & Seasonal Preparation Adjustments
Melbourne's shifting climate genuinely changes how a treatment is applied and what preparation matters most at different times of year — the same treatment type can call for a slightly different approach in July compared with January.
Wet Winter Subfloors
Saturated winter subfloors can dilute a liquid termiticide before it properly sets, and muddy, debris-blocked access hatches become more common. Scheduling around a dry weather window and confirming clear subfloor access matters more during this period than any other time of year.
Dry Summer Perimeter Cracking
Melbourne's dry summer conditions can cause perimeter soil to crack and pull away from foundation walls, creating gaps that let a chemical barrier run through unevenly rather than bonding as a continuous treated zone. Light watering the day before a barrier treatment — never during — helps the soil accept the product evenly.
Spring & Autumn Transition
These shoulder seasons bring the widest swing in daily conditions, so drying times can vary noticeably between an appointment scheduled for morning versus late afternoon. Our technicians factor current and forecast weather into the treatment plan and timing recommendations they give you on the day.
The preparation takeaway: the checklist doesn't change dramatically season to season, but which steps matter most does — subfloor access and moisture management dominate winter preparation, while soil condition and irrigation timing dominate summer preparation. Your confirmation details will always reflect the current seasonal guidance for your specific booking.
Local property types shift what matters most
Melbourne Region Preparation Notes
Property type and location across greater Melbourne shift which preparation steps carry the most weight for a given appointment — knowing the local pattern for your area helps set the right expectations before the technician even arrives.
South-East Growth Corridor
Clyde North, Cranbourne, Berwick, Pakenham
Newer estates often have easier subfloor access but recently established gardens right up against the foundation, making Module 2's perimeter-clearing step the most commonly needed prep in this region.
Inner Melbourne & CBD
CBD, inner north, inner south
Dense apartment living and a high concentration of commercial kitchens make Module 3's HACCP preparation the most frequently applied module here, alongside body-corporate coordination for shared-building treatments.
Eastern & Established Suburbs
Box Hill, Camberwell, Glen Waverley
Older housing stock, mature gardens and restricted original subfloor access mean Module 2's hatch-clearing step is particularly important, and appointments here often run slightly longer to account for it.
Northern, Western & Peninsula
Northern suburbs, western suburbs, Mornington Peninsula
Larger blocks, sheds and outbuildings mean Module 5's outdoor preparation carries more weight, and properties near waterways on the Peninsula benefit from extra attention to garden pond protection during treatment.
Confirming before, not guessing after
Inspection Equipment & Diagnostics
Where a treatment involves termites or an unclear pest issue, an inspection using thermal imaging and moisture detection equipment often precedes treatment — knowing this happens helps explain some of the access requirements covered in Module 2 and why a technician may spend longer assessing before actually applying anything.
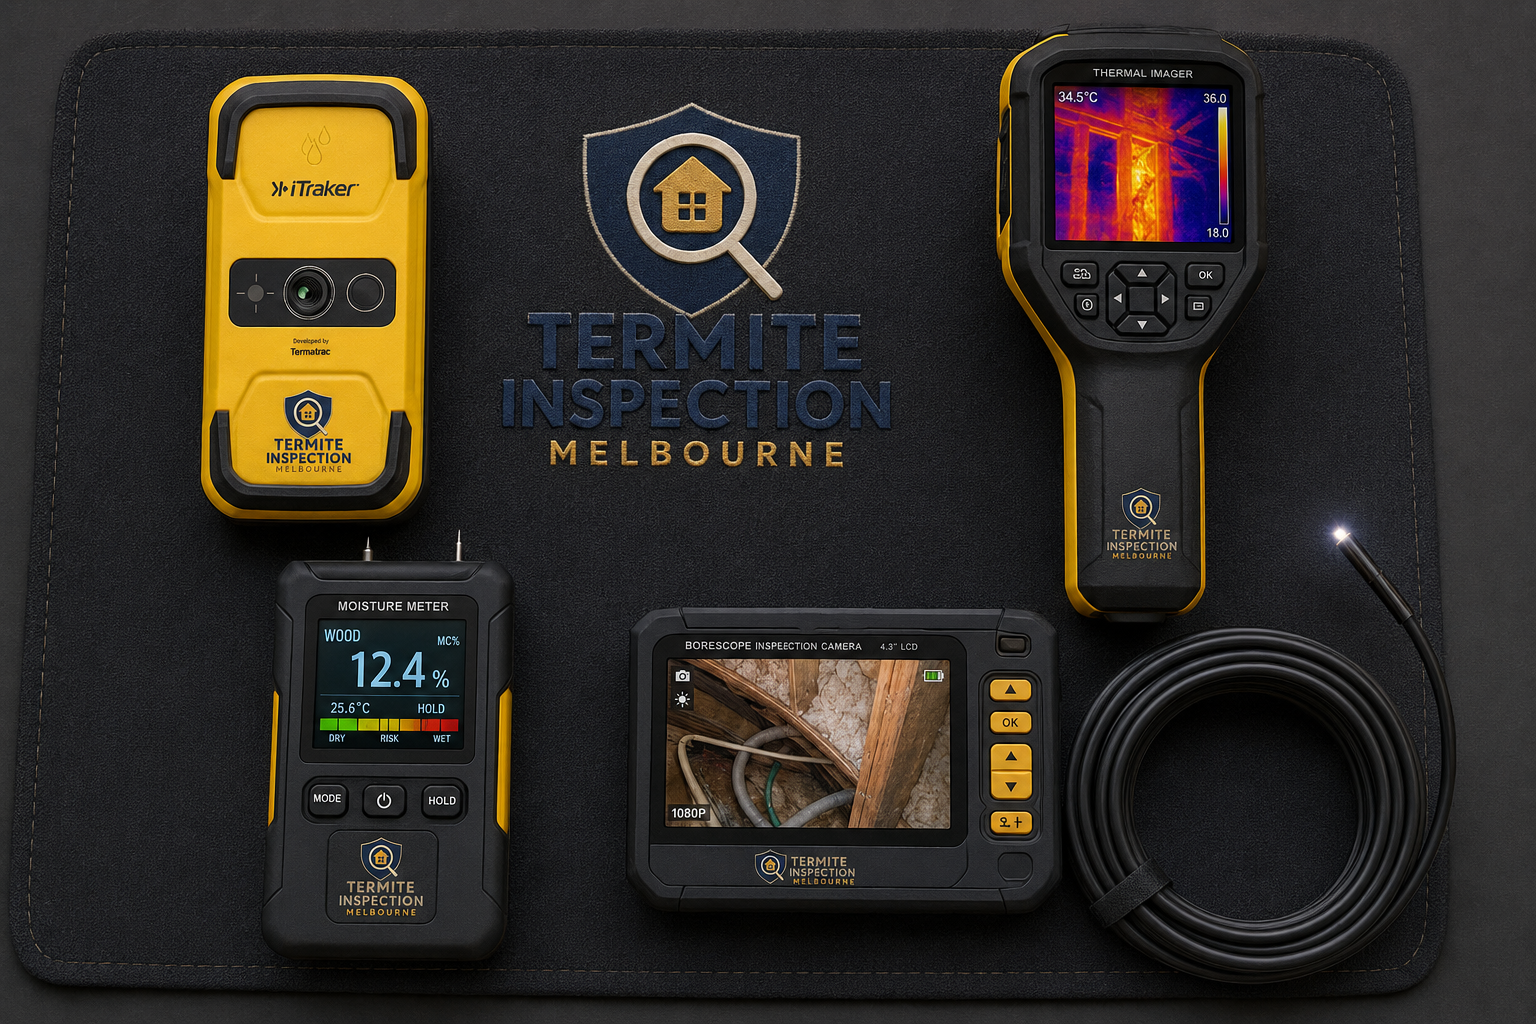
Why this matters for preparation: thermal imaging and moisture meters need the same clear wall, floor and subfloor access as the treatment itself, so the preparation steps in this guide serve both the inspection and treatment stages of a single appointment — there's no separate prep list for each.
A few things beyond the physical prep
What to Have Ready for Your Technician
Beyond clearing physical access, a handful of information and access items on the day help your appointment run smoothly from start to finish — small things that are easy to overlook but genuinely save time once the technician is on-site.
🔑
Property Access
Gate codes, key safes, or arranging for someone to be present — confirm how the technician will access the property, especially side gates and subfloor or roof access points, ahead of the appointment.
📄
Previous Treatment History
Any prior pest reports, previous treatment dates, or an existing termite barrier warranty document help our technician understand what's already been done and avoid duplicating or conflicting with earlier work.
📝
A List of What You've Noticed
Where you've seen activity, when, and any patterns you've noticed genuinely speeds up an accurate diagnosis and helps the technician prioritise the areas that matter most during a time-limited appointment.
💳
Payment & Contact Details
Confirm your preferred payment method and a mobile number the technician can reach you on if they have an access question or need to discuss something found during the inspection before proceeding.
Credentials you can verify
Certified Melbourne Pest Technicians
Every technician who walks your property is qualified, background-checked and trained specifically in safe application and family-friendly protocols — not making it up as they go. These credentials are available to check before you book, not just on request after.

Fully Licensed & Insured
Current pest-management licence and full public-liability insurance. Certificates available on request before we start.
AEPMA-Certified Technicians
Members of the Australian Environmental Pest Managers Association, trained in safe application, family protocols and commercial HACCP requirements.
APVMA-Approved Products
Every product used is applied strictly to label directions, with lower-toxicity and family-friendly options available on request.
Police-Checked Local Experts
Every technician is background-checked and Melbourne-based — the same trusted faces at your door or your kitchen, every visit.
Trusted across Melbourne
What Melbourne Homes & Businesses Say
Trusted across Melbourne for both residential and commercial pest work — here's what property owners and business operators say about their preparation and treatment experience with us.
4.9
Rated on Google
from 2,000+ local Melbourne properties
Verified customer reviews
“We run a small cafe and their pre-treatment checklist meant we barely lost any trading time. Scheduled around closing and left a proper compliance report for our files.”
“Didn't realise how much prep a termite barrier actually needs until they explained it — cleared the garden bed and it went smoothly with no issues on the day.”
“Have a fish tank and two birds so was worried about safety. They talked us through exactly what to cover and when it was safe to bring the birds back inside.”
“Honestly appreciated being told not to vacuum for two weeks after — would have washed it all away otherwise and probably called back complaining it didn't work.”
“Booked a termite inspection and they were upfront that we needed to clear the subfloor hatch beforehand. Made the whole visit faster and the report was thorough.”
Answers before your appointment
Pre-Treatment Preparation FAQs
What do I need to do before a general pest control treatment in Melbourne? +
Clear kitchen benches and cupboards near skirting boards, box or bag pantry items rather than leaving them exposed, cover fish tanks with their filtration switched off during application, wash and store pet bedding away from treatment areas, and pick up toys, shoes and loose items from floors so technicians have full access to skirting boards, corners and entry points. A ten-minute tidy-up before the appointment genuinely improves treatment coverage and lets our technician work faster and more thoroughly.
Do I need to evacuate my house during a termite chemical barrier installation? +
Not usually for the majority of the property, but you do need to stay clear of the immediate work area — typically the external perimeter and any accessed subfloor zone — while trenching and chemical application are underway, and for a short period afterwards while the product settles. Most residents remain comfortably inside other parts of the home during a standard barrier installation; our technician will confirm the exact clearance zone and timing on the day based on your property's layout and the specific treatment being applied.
How long do I need to keep pets away after a flea or spider spray? +
As a general guide, keep pets off treated surfaces and away from treated areas until the product has fully dried, typically 1-2 hours depending on weather and ventilation, and always follow the specific re-entry timeframe your technician provides on the day for the exact product used. For outdoor perimeter treatments, keeping pets off treated garden beds and lawn areas for the same drying window is the safest approach, and we always confirm product-specific guidance before we leave the property.
How should restaurants and cafes prepare their kitchens for commercial pest treatments? +
Cover or remove exposed food, seal or relocate loose utensils and crockery away from treatment zones, ensure grease traps and drains are accessible (and ideally cleaned beforehand for maximum treatment effectiveness), and coordinate a shutdown or reduced-service window with our team that fits your trading hours where possible. Most commercial kitchen treatments are scheduled around closing time or a quiet trading period specifically so service disruption is minimised, and we provide a written pre-treatment checklist ahead of the appointment so your team knows exactly what to prepare.
Can TIM's technicians assist with heavy lifting or subfloor clearing if I am unable to do it myself? +
Our technicians can move light, easily accessible items as part of a standard appointment, but heavy furniture, large stored items or a significantly cluttered subfloor access point are best cleared before we arrive, since time spent relocating heavy items on-site reduces the time available for the actual treatment. If you're unable to prepare a specific area yourself — due to mobility, time constraints or the scale of what needs moving — call ahead and we'll talk through options, including scheduling extra time for the appointment or recommending you arrange help beforehand.
What happens if I forget to prepare my house before the technician arrives? +
It's not the end of the world — our technicians will do what they reasonably can around an unprepared space, but treatment coverage and effectiveness may be reduced in areas that remain blocked or cluttered, and in some cases a follow-up visit may be needed to properly treat an area that couldn't be accessed on the day. If you know in advance that you won't have time to prepare fully, call ahead so we can advise what matters most to prioritise, or discuss rescheduling.
Is it safe to vacuum or mop treated areas straight after a pest treatment? +
No — avoid vacuuming, mopping or wiping down treated skirting boards, floors and surfaces for at least 7-14 days after a residual treatment, as this is the window in which the product remains active and continues working against pests crossing the treated surface. Washing it away early significantly reduces the treatment's effectiveness and is one of the most common reasons a "failed" treatment actually just needed more time to work. Normal daily activity like walking through the house is fine; it's the direct washing or scrubbing of treated surfaces specifically that needs to wait.
Why do supermarket bug bombs sometimes seem to make an infestation worse? +
Foggers and bombs disperse product into open air space, which mainly affects pests caught out in the open at that exact moment rather than the ones sheltering inside wall cavities, subfloors or deep crevices where colonies actually live. Worse, the sudden chemical exposure can trigger a stress response that scatters a cockroach or ant population deeper into inaccessible areas of the property rather than eliminating the source, which is why an infestation can appear to spread or "get worse" shortly after a DIY bomb is used.
Do I need to turn off my garden reticulation or irrigation system before a termite barrier treatment? +
Yes — reticulation and irrigation systems running near the treated perimeter can dilute or wash away a chemical soil treatment before it has properly bonded with the soil, significantly reducing the barrier's effectiveness. Turn off any sprinkler or drip system covering the treatment zone at least 24 hours before the appointment and keep it off for the period your technician specifies afterwards, which is typically several days depending on the product used and current weather conditions.
How does pre-treatment preparation change between summer and winter in Melbourne? +
Summer's dry conditions can cause perimeter soil to crack and pull away from foundations, which actually needs addressing (light watering the day before, not during) so a termite barrier chemical bonds evenly rather than running through gaps. Winter's wet, saturated subfloors can dilute a liquid termiticide before it sets, so scheduling around a dry weather window matters more, and ensuring subfloor access hatches aren't blocked by mud or debris becomes a bigger part of preparation. Our technician will factor the season into both the preparation advice they give you and the treatment approach itself.
Do I need to be home for the entire appointment? +
For most residential treatments, someone over 18 needs to be present to provide access and confirm the areas to be treated, but you don't need to stay in the room while application happens. For an outdoor-only perimeter treatment, some clients arrange access without being present, though we generally recommend being available by phone in case the technician has an access question once on-site.
Will preparation be different if I have a newborn or someone pregnant in the household? +
Yes, and it's worth mentioning this when you book rather than on the day, so we can recommend a lower-toxicity product option and a more conservative re-entry timeframe from the outset. Extra ventilation time and, in some cases, arranging for vulnerable household members to be elsewhere during application and the initial drying period is a sensible precaution we're always happy to plan around.
What if my rental property needs treatment but I don't own it? +
Tenants should get written approval from their landlord or property manager before booking a treatment, particularly anything involving structural work like a termite barrier, and should confirm who is responsible for the cost. For standard pest treatments, most landlords are happy to authorise a booking quickly once they understand the preparation and safety protocols involved — we're also happy to speak directly with a property manager if that helps move things along.
Ready to Book With Complete Peace of Mind?
Speak directly with our certified Melbourne pest experts to schedule your treatment today — save $250 off complete treatments plus a free thermal scan ($150 value) when you book this week. We'll walk you through exactly what to prepare for your specific appointment before you confirm, whether it's a straightforward household spray or a full termite barrier installation.
🎯 Offer ends 31th October 2026 • ✓ Licensed & Insured • ✓ 4.9★ Rated • ✓ Written Preparation Guidance Every Booking